Easy Chia Seed Jam Recipe – Quick Healthy Spread
How to Make Chia Seed Jam is an absolute game-changer for your breakfast table and beyond! Forget those sugary store-bought versions; we’re about to unlock the secret to a vibrant, healthy, and incredibly easy homemade jam. Have you ever craved that burst of fruity goodness without the guilt? That’s precisely where this magical chia seed jam shines. Its popularity has exploded because it’s incredibly versatile, unbelievably simple to whip up, and packed with nutrients. What truly makes this chia seed jam special is its incredible texture – thick, spreadable, and studded with those delightful little chia seeds, offering a satisfying chew. Plus, it’s a fantastic way to boost your fiber and omega-3 intake. Get ready to transform your toast, yogurt, and even your smoothies with this wonderfully wholesome creation!
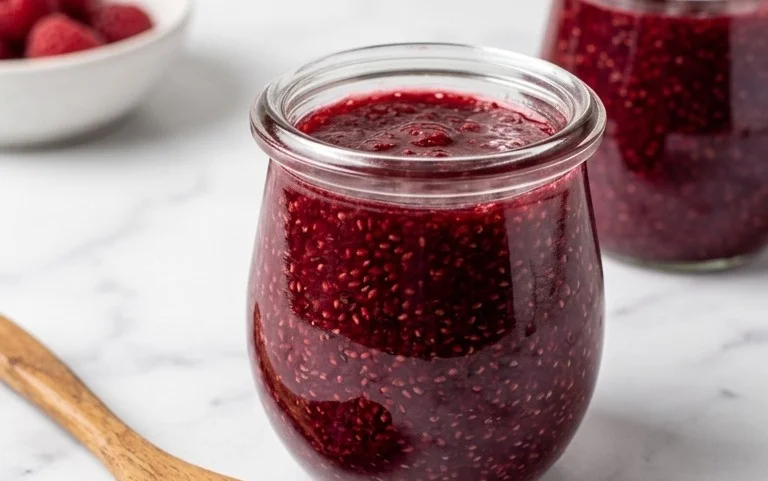
How to Make Delicious Chia Seed Jam
Forget those store-bought jams loaded with added sugars and preservatives. Making your own chia seed jam is incredibly simple, healthy, and surprisingly versatile. This recipe is a game-changer for breakfast toast, yogurt parfaits, or even as a sweetener for your morning oatmeal. Plus, the chia seeds not only act as a natural thickener but also pack a nutritional punch, providing fiber, omega-3 fatty acids, and antioxidants. You’ll be amazed at how easily you can transform fresh fruit into a luscious, wholesome jam in just a few minutes.
Ingredients:
- 3 cups Fresh Berries of choice*
- ¼ cup Filtered Water
- 1 tbsp Maple Syrup*
- 2-3 tbsp Chia Seeds*
- Juice of 1/2 Lemon
*A note on ingredients: Feel free to get creative with your berries! Strawberries, blueberries, raspberries, blackberries, or a mix of your favorites all work beautifully. If you prefer a sweeter jam, you can adjust the maple syrup to your liking. Similarly, the amount of chia seeds can be slightly tweaked depending on how thick you want your jam.
Cooking Instructions:
Making chia seed jam is a straightforward process that requires minimal effort and time. Here’s how you can whip up a batch in your kitchen:
Step 1: Prepare the Fruit
The first step is to get your berries ready. If you’re using strawberries, it’s best to hull them and then give them a quick chop, especially if they are on the larger side. This helps them break down more easily during the cooking process and contributes to a smoother jam texture. For smaller berries like blueberries or raspberries, you can often leave them whole. If you’re using a mix, just ensure everything is relatively uniform in size for even cooking. You can either mash your berries slightly with a fork or potato masher at this stage if you prefer a less chunky jam, or you can let them break down naturally as they cook.
Step 2: Simmer the Berries
In a medium saucepan, combine your prepared berries and the filtered water. Place the saucepan over medium heat. Stir gently as the berries begin to heat up. You’ll notice them start to release their juices and soften. This simmering process is crucial for breaking down the fruit and creating the base for your jam. Allow the mixture to simmer for about 5-7 minutes, stirring occasionally. You want the berries to be soft and starting to burst. If you see a lot of liquid evaporating, you can reduce the heat slightly to prevent it from becoming too dry.
Step 3: Add Sweetener and Lemon Juice
Once the berries have softened and released a good amount of their juice, it’s time to add the maple syrup and the juice of half a lemon. The maple syrup will add a touch of sweetness, and you can taste and adjust it here if you think it needs a little more. The lemon juice is a vital ingredient; it not only adds a bright, fresh flavor that complements the sweetness of the fruit but also helps to balance the taste and acts as a natural preservative, extending the shelf life of your jam. Stir these ingredients in well until they are fully incorporated into the berry mixture.
Step 4: Introduce the Chia Seeds
Now comes the magic ingredient: the chia seeds. Sprinkle the chia seeds evenly over the berry mixture. It’s important to stir them in immediately and thoroughly to prevent them from clumping together. The chia seeds will begin to absorb the liquid from the berries and water, creating that signature gel-like consistency that makes jam so spreadable. Continue to stir the mixture for about 1-2 minutes, ensuring every bit of the chia seeds is moistened. As you stir, you’ll notice the jam starting to thicken.
Step 5: Thicken and Cool
After stirring in the chia seeds, remove the saucepan from the heat. The jam will continue to thicken as it cools. You can let it sit on the counter for about 10-15 minutes, stirring occasionally. During this time, the chia seeds will swell and form a gelatinous matrix, transforming your fruity concoction into a jam. If you find that after 15 minutes the jam is still a bit too thin for your liking, you can stir in another tablespoon of chia seeds and let it sit for another 5-10 minutes. Remember, it will thicken further in the refrigerator.
Step 6: Store Your Jam
Once your chia seed jam has reached your desired consistency, it’s time to store it. Carefully spoon the jam into a clean, airtight jar or container. Allow it to cool completely at room temperature before covering it and transferring it to the refrigerator. Chia seed jam is best enjoyed within about 1-2 weeks when stored in the refrigerator. The natural thickening agents and lemon juice help preserve it, but it’s always best to consume it fresh for the optimal flavor and texture. Enjoy your homemade, healthy, and delicious chia seed jam on toast, with yogurt, or in any way you please!
Conclusion:
There you have it! Making your own chia seed jam is incredibly simple, wonderfully healthy, and surprisingly versatile. We’ve shown you how easy it is to transform simple ingredients into a delicious and guilt-free spread. The beauty of this recipe lies in its natural sweetness, high fiber content thanks to the wonderful chia seeds, and the absence of refined sugars often found in store-bought alternatives. It’s a fantastic way to enjoy the flavors of your favorite fruits while nourishing your body. We encourage you to give this recipe a try – you might be surprised at how much you love it!
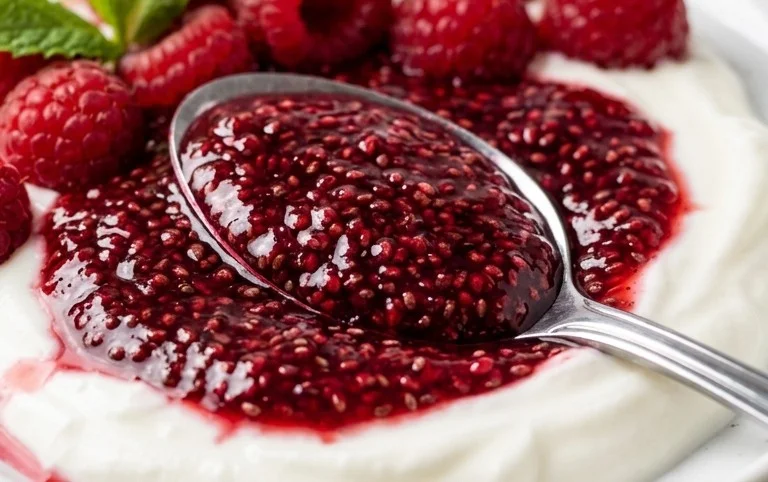
This homemade chia seed jam is perfect spread on whole-wheat toast, swirled into yogurt or oatmeal, used as a topping for pancakes or waffles, or even as a base for salad dressings. Feel free to experiment with different fruit combinations – berries are classic, but don’t shy away from peaches, apricots, or even a tropical mango and passionfruit blend. Adding a touch of vanilla extract or a pinch of cinnamon can also elevate the flavor profile.
Frequently Asked Questions:
Can I make chia seed jam with frozen fruit?
Absolutely! Frozen fruit works beautifully for chia seed jam. In fact, it can even help cool the mixture down faster. Simply thaw the frozen fruit slightly before mashing or blending it, and proceed with the recipe as usual. The jam will thicken up just the same.
How long does chia seed jam last?
When stored in an airtight container in the refrigerator, your homemade chia seed jam should last for about 1 to 2 weeks. Keep an eye and nose out for any signs of spoilage, but generally, it’s quite stable. Freezing is also an option for longer storage.
Do I need to cook chia seed jam?
While some recipes involve a brief simmer to meld flavors, this particular method focuses on a no-cook approach, relying on the chia seeds to absorb liquid and thicken the jam naturally. This preserves more of the raw nutrients from the fruit. If you prefer a cooked jam consistency, a very short simmer (a minute or two) can be incorporated after adding the chia seeds, but it’s not strictly necessary for thickening.
How to Make Chia Seed Jam
A simple and healthy way to make homemade jam using fresh berries and chia seeds.
Ingredients
-
3 cups Fresh Berries of choice
-
1/4 cup Filtered Water
-
1 tbsp Maple Syrup
-
2-3 tbsp Chia Seeds
-
Juice of 1/2 Lemon
Instructions
-
Step 1
Combine the fresh berries, filtered water, and maple syrup in a saucepan. -
Step 2
Cook over medium heat, stirring occasionally, until the berries break down and the mixture simmers. -
Step 3
Remove from heat and mash the berries with a fork or potato masher to your desired consistency. -
Step 4
Stir in the chia seeds and lemon juice. -
Step 5
Let the mixture sit for at least 15-20 minutes, or until it thickens into a jam-like consistency. Stir occasionally. -
Step 6
Pour into a clean jar and store in the refrigerator.
Important Information
Nutrition Facts (Per Serving)
It is important to consider this information as approximate and not to use it as definitive health advice.
Allergy Information
Please check ingredients for potential allergens and consult a health professional if in doubt.